Have you tried Real Player SP for Mac OS X or Windows?
As a teacher and presenter I have frequently experienced the frustration of one of my critical videos not working during a presentation or classroom lesson because video is online through a service live YouTube. Have you had that happen to you? Usually the culprit of my online video dilemma is due to a blocked firewall or failed Internet access. With Real Player SP you will remain calm for your presentation and that online video can always work for your presentations. That is because Real Player SP not only allows you to download video & music files, but it also has a converter. That means you can easily download videos for your classroom or use without having to be connected to the web. You can even do it from YouTube or your favorite video service or music playing site. Plus, you will have the option of converting downloaded video for use on your MP3 player, iPod, iTouch or iPhone. Oh! And did I mention you can also trim and clip video while previewing it on Real Player SP. The possibilities are just endless.
Real Player SP Download Sites
RealPlayer SP for Mac
Installation for MAC instructions.
Real Player SP for Windows
This video from Real Player will show you how to use it. The program looks a little different on the MAC than on Windows but it is basically the same.
How to convert your You Tube videos in Real Player to MP3 or other formats.
Have fun and be sure to share your finds!
Sunday, June 13, 2010

Sunday, May 9, 2010
The Fantastic Digital Video Tool Kit Workshop
 Avatar? District 9? Those Hollywood blockbusters don’t even compare. The Fantastic Digital Video Toolkit session will showcase a variety of free online video tools, tips and resources that will unleash your students’ inner director and might just land them that first Oscar.
I am teaching a new workshop this summer at Field of Dreams called, The Fantastic Digital Video Tool Kit, at Perry High School. All of the programs I will be showcasing are free. If you are a CTAE teacher currently teaching in a Georgia school and would like to register for this great workshop please login to the CTAE Resourse Network to register.
A condensed version of the workshop will be presented at the 2010 GACTE Conference this summer for the Business Education Division. I look forward to seeing you there.
Sunday, November 29, 2009
Photo Sharing With Google's Picasa
Picasa is Google's fast and easy photo sharing program. Google states, "Picasa & Picasa Web Albums make it easy for you to organize and edit your digital photos, then create online albums to share with friends, family & the world." The online program also provides you with plenty of storage and allows you to not only put your pictures on a safe server but also to share your images via email or online web pages. Picasa is also a great way to back up your pictures or to store pictures if you are low on storage space on your computer or your web server.
Creating A Photo SlideShow On Picasa
Below I will show you how you can use Picasa's embed slideshow to add a slideshow to display multiple pictures to your web page or blog via Picasa. If you do not know what an embed tag is take a look at my short previous post it will help you understand what you are about to do a little better.
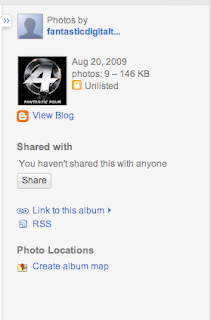
Steps to making a web slideshow on Picasa:
Note: If you are familiar with Picasa skip to step 3.
1. First you will need a Google Account or Picasa account. Both are free and if you click on the links you can sign up. They will both give you access to Picasa. If you have a Google Gmail account then you already have an account. Just go to Picasa's web page and login with your same username and password as your Gmail account.
2. Upload your pictures to an album. You can use Picasa's online uploading program or install Picasa on your computer to do this. If you install the program be sure to look for the button that says upload your pictures online. I also suggest you watch the videos below so you can get a better understanding of how Picassa works.
3. Once your pictures are uploaded go to your online album on the right side click on the
 Link to this album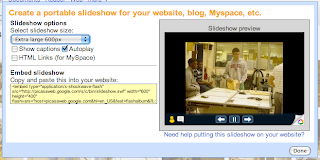
4. Then click on the  Embed Slideshow. This tag will allow you to create your slideshow.
Embed Slideshow. This tag will allow you to create your slideshow.5. A new window will open that will ask
you how you would like your slideshow to appear once you post it. You will need to chose the size and what you would like to include in your slide show like captions and links.
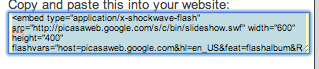
6. Next copy the embed tag by going to Edit copy on your browser or use the short cut key Control C
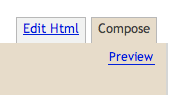
7. Paste the embed tag into your blog or webpage HTML. On Blogger you will need to go to the Edit HTML section of your post to paste it. In Dreamweaver you will do the same thing add the code to your HTML area.
8. Upload your webpage or publish your blog post and you've got yourself a very fancy slideshow embed in your page.
Picasa Introduction Videos
Click on the arrows to move to the next video on my playlist.
What Are Embed Tags?
Embed tags allow you to add movies, music, flash files, pictures, widgets, your Twitter and Facebook feeds, and all sorts of gadgets to your web pages. Embed tags in HTML (the language used to write webpages) are written like this: < embed src="helloworld.swf" > You can read more about embed tags at W3 schools.
Whenever you see embed tags it usually indicates that the gadget can probably be added to your blog or web page by adding the code following the < embed > tag on your page. A good example is the embed tag you find in a YouTube video. As long as the creator of the video hasn't disabled the embed code you can grab the video's embed code and add the video to your blog post or web page. In my next post I will show you how to add a picture slideshow using an embed tag to a web page or blog.
Whenever you see embed tags it usually indicates that the gadget can probably be added to your blog or web page by adding the code following the < embed > tag on your page. A good example is the embed tag you find in a YouTube video. As long as the creator of the video hasn't disabled the embed code you can grab the video's embed code and add the video to your blog post or web page. In my next post I will show you how to add a picture slideshow using an embed tag to a web page or blog.
Tuesday, November 24, 2009
Fun Classroom Learning With Video
Student Learning Is Easy When You Make A Video
Do you have students who have difficulty learning something? Memorizing is an option, but how about putting students in a video to help them reflect on the standard they are trying to master. This month my first grader had to do just that. He had to memorize a poem for his grade level's poetry recital. He chose Jaberwocky, by Lewis Carroll. You might have also seen him tweeting his lines to practice on Twitter. The poem's rhetoric is difficult for any age group since the words in the poem do not exist. Needless to say it was a challenge to remember and learn it. So I decided to create a video to give him the opportunity to hear himself pronounce the words. With his video, he was able to see where he needed to work on his inflection and where he needed additional practice. The result, thanks to all his hard work, was he was one of three finalists from his class. We were very proud of him. I don't know about you, but I also see how this type of learning through video creation can have application to help ESOL or ESE students.
Jabberwocky In The Tulgey Woods
This is my son reciting his video and yes he's in the Tulgey Woods from Alice in Wonderland. We created the effect using Photo Booth 2.03 on a Mac. This fun application allows you to take video and add backgrounds to your video. It is a ton of fun to use and you could literally put yourself in any country or any location. The background could even be a computer motherboard. If you look at this previous post, you will see me experimenting with it at the Discovery Education workshop. Thanks Hall Davidson for the great tutorial! I have included directions on how to do this effect on Photo Booth below.
Photo Booth Requirements:
Directions:
If you are on a Windows machine there are quite a few programs you can try. Any of the programs below can offer the same kind of affect however some of them only take pictures and do not allow video. Also you will need a webcam and your web browser will need Adobe Flash installed. Some of these sites work best if you sign up for a free account and some do not work on a MAC.
Enjoy!
Do you have students who have difficulty learning something? Memorizing is an option, but how about putting students in a video to help them reflect on the standard they are trying to master. This month my first grader had to do just that. He had to memorize a poem for his grade level's poetry recital. He chose Jaberwocky, by Lewis Carroll. You might have also seen him tweeting his lines to practice on Twitter. The poem's rhetoric is difficult for any age group since the words in the poem do not exist. Needless to say it was a challenge to remember and learn it. So I decided to create a video to give him the opportunity to hear himself pronounce the words. With his video, he was able to see where he needed to work on his inflection and where he needed additional practice. The result, thanks to all his hard work, was he was one of three finalists from his class. We were very proud of him. I don't know about you, but I also see how this type of learning through video creation can have application to help ESOL or ESE students.
Jabberwocky In The Tulgey Woods
This is my son reciting his video and yes he's in the Tulgey Woods from Alice in Wonderland. We created the effect using Photo Booth 2.03 on a Mac. This fun application allows you to take video and add backgrounds to your video. It is a ton of fun to use and you could literally put yourself in any country or any location. The background could even be a computer motherboard. If you look at this previous post, you will see me experimenting with it at the Discovery Education workshop. Thanks Hall Davidson for the great tutorial! I have included directions on how to do this effect on Photo Booth below.
Photo Booth Requirements:

- You will need a web cam and a MAC. If you do not have a MAC see below for free alternatives for Windows.
- Then you will need Photo Booth 2.03 or above. This program comes pre-installed with OS X.
Directions:
- First be sure you have your picture ready. You will need the picture to be in .jpg, .gif, or .png format. There are some really cool pre-made
 backgrounds already preset in the program that you can use too.
 - Go to the video camera feature it looks like
 a movie rail.
 - Use the arrow keys to scroll to the drop your background here feature

- Drop your background (your picture)
- Click on the video camera to record your video
- The program will ask you to step out of the frame and then back in
- I recommend you have a clean background. Think green screen like they do in the movies. The cleaner the background the better the quality of your film.
- Have fun!
- If you make anything neat be sure to share. I would love to see your ideas. My students are working on Networking Web pages so you might just see a follow up post using their Networking video examples.


If you are on a Windows machine there are quite a few programs you can try. Any of the programs below can offer the same kind of affect however some of them only take pictures and do not allow video. Also you will need a webcam and your web browser will need Adobe Flash installed. Some of these sites work best if you sign up for a free account and some do not work on a MAC.
Enjoy!
Monday, October 26, 2009
Adobe's Photoshop.com: A Free Online Photo Editor
In our budget minded classrooms it is always nice to find a great application available for free online. Adobe has this wonderful web app (application) called Photoshop.com that allows you to edit pictures very much like the very expensive flagship program, Photoshop. The real real version of Photoshop as you might know can cost you $699. Luckily for our classrooms Adobe offers Photoshop.com the slimmer version online for free. Plus they offer Photoshop's awesome tools with 2 gigabyes of storage space. My students will be signing up for free accounts on Photoshop.com and using it in my classroom since having this web app available will help them continue to develop their picture editing skills when they exit my class. Many times I have students exit my program and then never get to use the expensive Adobe software I teach them on. This web app will hopefully help them continue to strengthen their photo editing skills and allow them to use it to create projects for other subjects.
How To Use Photoshop.com
This video will explain the basics of how to use Photoshop.com's picture editing tools. It might be a good video to download using Real Player's download feature so your students can refer to it while they use it in your classrooms.
Q&A About Adobe's Photoshop.com
This Q&A section is from Adobe.com. It might help you with some of the requirements needed to run this program from your classroom computers. The other exciting news about this program is that it is available for the iPhone and other mobile phones for free. The second Q&A section will tell you more about this feature. If you do try this program or any other online photo editing web app I would love to hear your experiences with them in the classroom.
How To Use Photoshop.com
This video will explain the basics of how to use Photoshop.com's picture editing tools. It might be a good video to download using Real Player's download feature so your students can refer to it while they use it in your classrooms.
Q&A About Adobe's Photoshop.com
This Q&A section is from Adobe.com. It might help you with some of the requirements needed to run this program from your classroom computers. The other exciting news about this program is that it is available for the iPhone and other mobile phones for free. The second Q&A section will tell you more about this feature. If you do try this program or any other online photo editing web app I would love to hear your experiences with them in the classroom.
"Q: What is Photoshop.com?
A: Photoshop.com is the complete solution for managing, editing, storing, and sharing your photos online, with tutorials, inspiration, and more. Photoshop.com is available from any web-enabled computer, compatible mobile phones, and directly from within Adobe® Photoshop® Elements 7 or Adobe Premiere® Elements 7 software. With Photoshop.com, you can organize, tweak, create, e-mail, display, and store your photos.Q: Is there a mobile app for Photoshop.com?
A: Yes. Photoshop.com Mobile lets you view and upload photos from your compatible mobile phone to Photoshop.com. You can download the software from Photoshop.com—see Photoshop.com Community Questions—Mobile for more information.Q:What phones does Photoshop.com Mobile support?
A: Photoshop.com Mobile directly supports a number of Windows Mobile phones from HTC, Samsung, Motorola, and Palm, including a few touch phones. See http://mobile.photoshop.com for the latest list of supported devices. Adobe partnered with ShoZu to offer users of the iPhone, BlackBerry, and other phones the ability to upload and store photos. With ShoZu, you can also take advantage of the photo editing, management, and sharing capabilities on Photoshop.com. For more information, visit www.shozu.com.Q: What are the system requirements?
A: To use Photoshop.com, you need the following:
- internet-connected computer with Windows XP or Vista, or Mac OS 10.4 or later
- a minimum screen resolution of 1024 x 768; 512 MB of RAM
- Internet Explorer 6, 7, or 8 (Windows), Safari 3.0.4 or later (Mac OS), or Firefox 2 or later (either platform)
- Flash Player 10 (version 10.0.22 or later)
- The new landing page could run slowly if you have an older Mac G4 system. After creating your own login credentials and selecting Remember Me, you can skip the landing page on future visits to Photoshop.com.
Q: What type of security measures are in place for Photoshop.com?
A: Adobe uses industry-leading security engineering practices and processes in building its products. With Photoshop.com, security is considered at every level, from the applications to networks to physical facilities. In addition to the latest technologies, world-class security requires ongoing adherence to best-practices policies. When you access Photoshop.com, Secure Sockets Layer (SSL) technology is used for server authentication, helping to protect your data and access. Additionally, Photoshop.com leverages firewall protection, intrusion detection systems, SSL encryption, and proprietary protocols to help protect your important information. Multiple layers of physical security protect the Photoshop.com hosting facilities—only authorized personnel have access to the facilities and servers.Q: Does Photoshop.com work with video files as well as photos?
A: You can upload video files from the Photoshop Elements 7 or Adobe Premiere Elements 7 organizer to Photoshop.com. You can also download video files anywhere using a web browser, and view them on any video player that handles the file type. In the online organizer on Photoshop.com, video files are designated with a filmstrip icon. Video editing is not one of the features of Photoshop.com. However, Adobe anticipates that it will be one of the features requested by customers for future additions. Stay tuned!Q: What rights do I have to my photos?
A: Refer to the Terms Of Use link for the specific legal terms and conditions for using Photoshop.com. You'll find it at the lower-right corner of the Photoshop.com window, along with a link to the Privacy Policy for the service."
Enjoy!
Alex
Friday, September 25, 2009
CSS Code Lesson 1 - Changing Your Blog Background Color
Changing the background color or picture in your blog account is actually a simple fix in your CSS code. It is important to note that you can edit the color of you blog or WCMS (web content management system) without going into the manual CSS Code of your site. However, the purpose of this post is not only to learn how to change the background color of you blog but to also to learn how to change CSS code on your blog. Doing this lesson will help you learn the basics of CSS and then you can try some more advanced CSS coding like how to change the width of your blog, create a custom banner, and change images. So take a deep breath you are about to learn the basics of CSS or Cascading Style Sheets.
What is CSS?
CSS dictates the color scheme, navigation and overall look and feel of your blog. If you are a beginner to CSS you might want to review this previous post: What are CSS style sheets? This way you get a better understanding of what you are about to learn.
Understanding Color and Web Pages
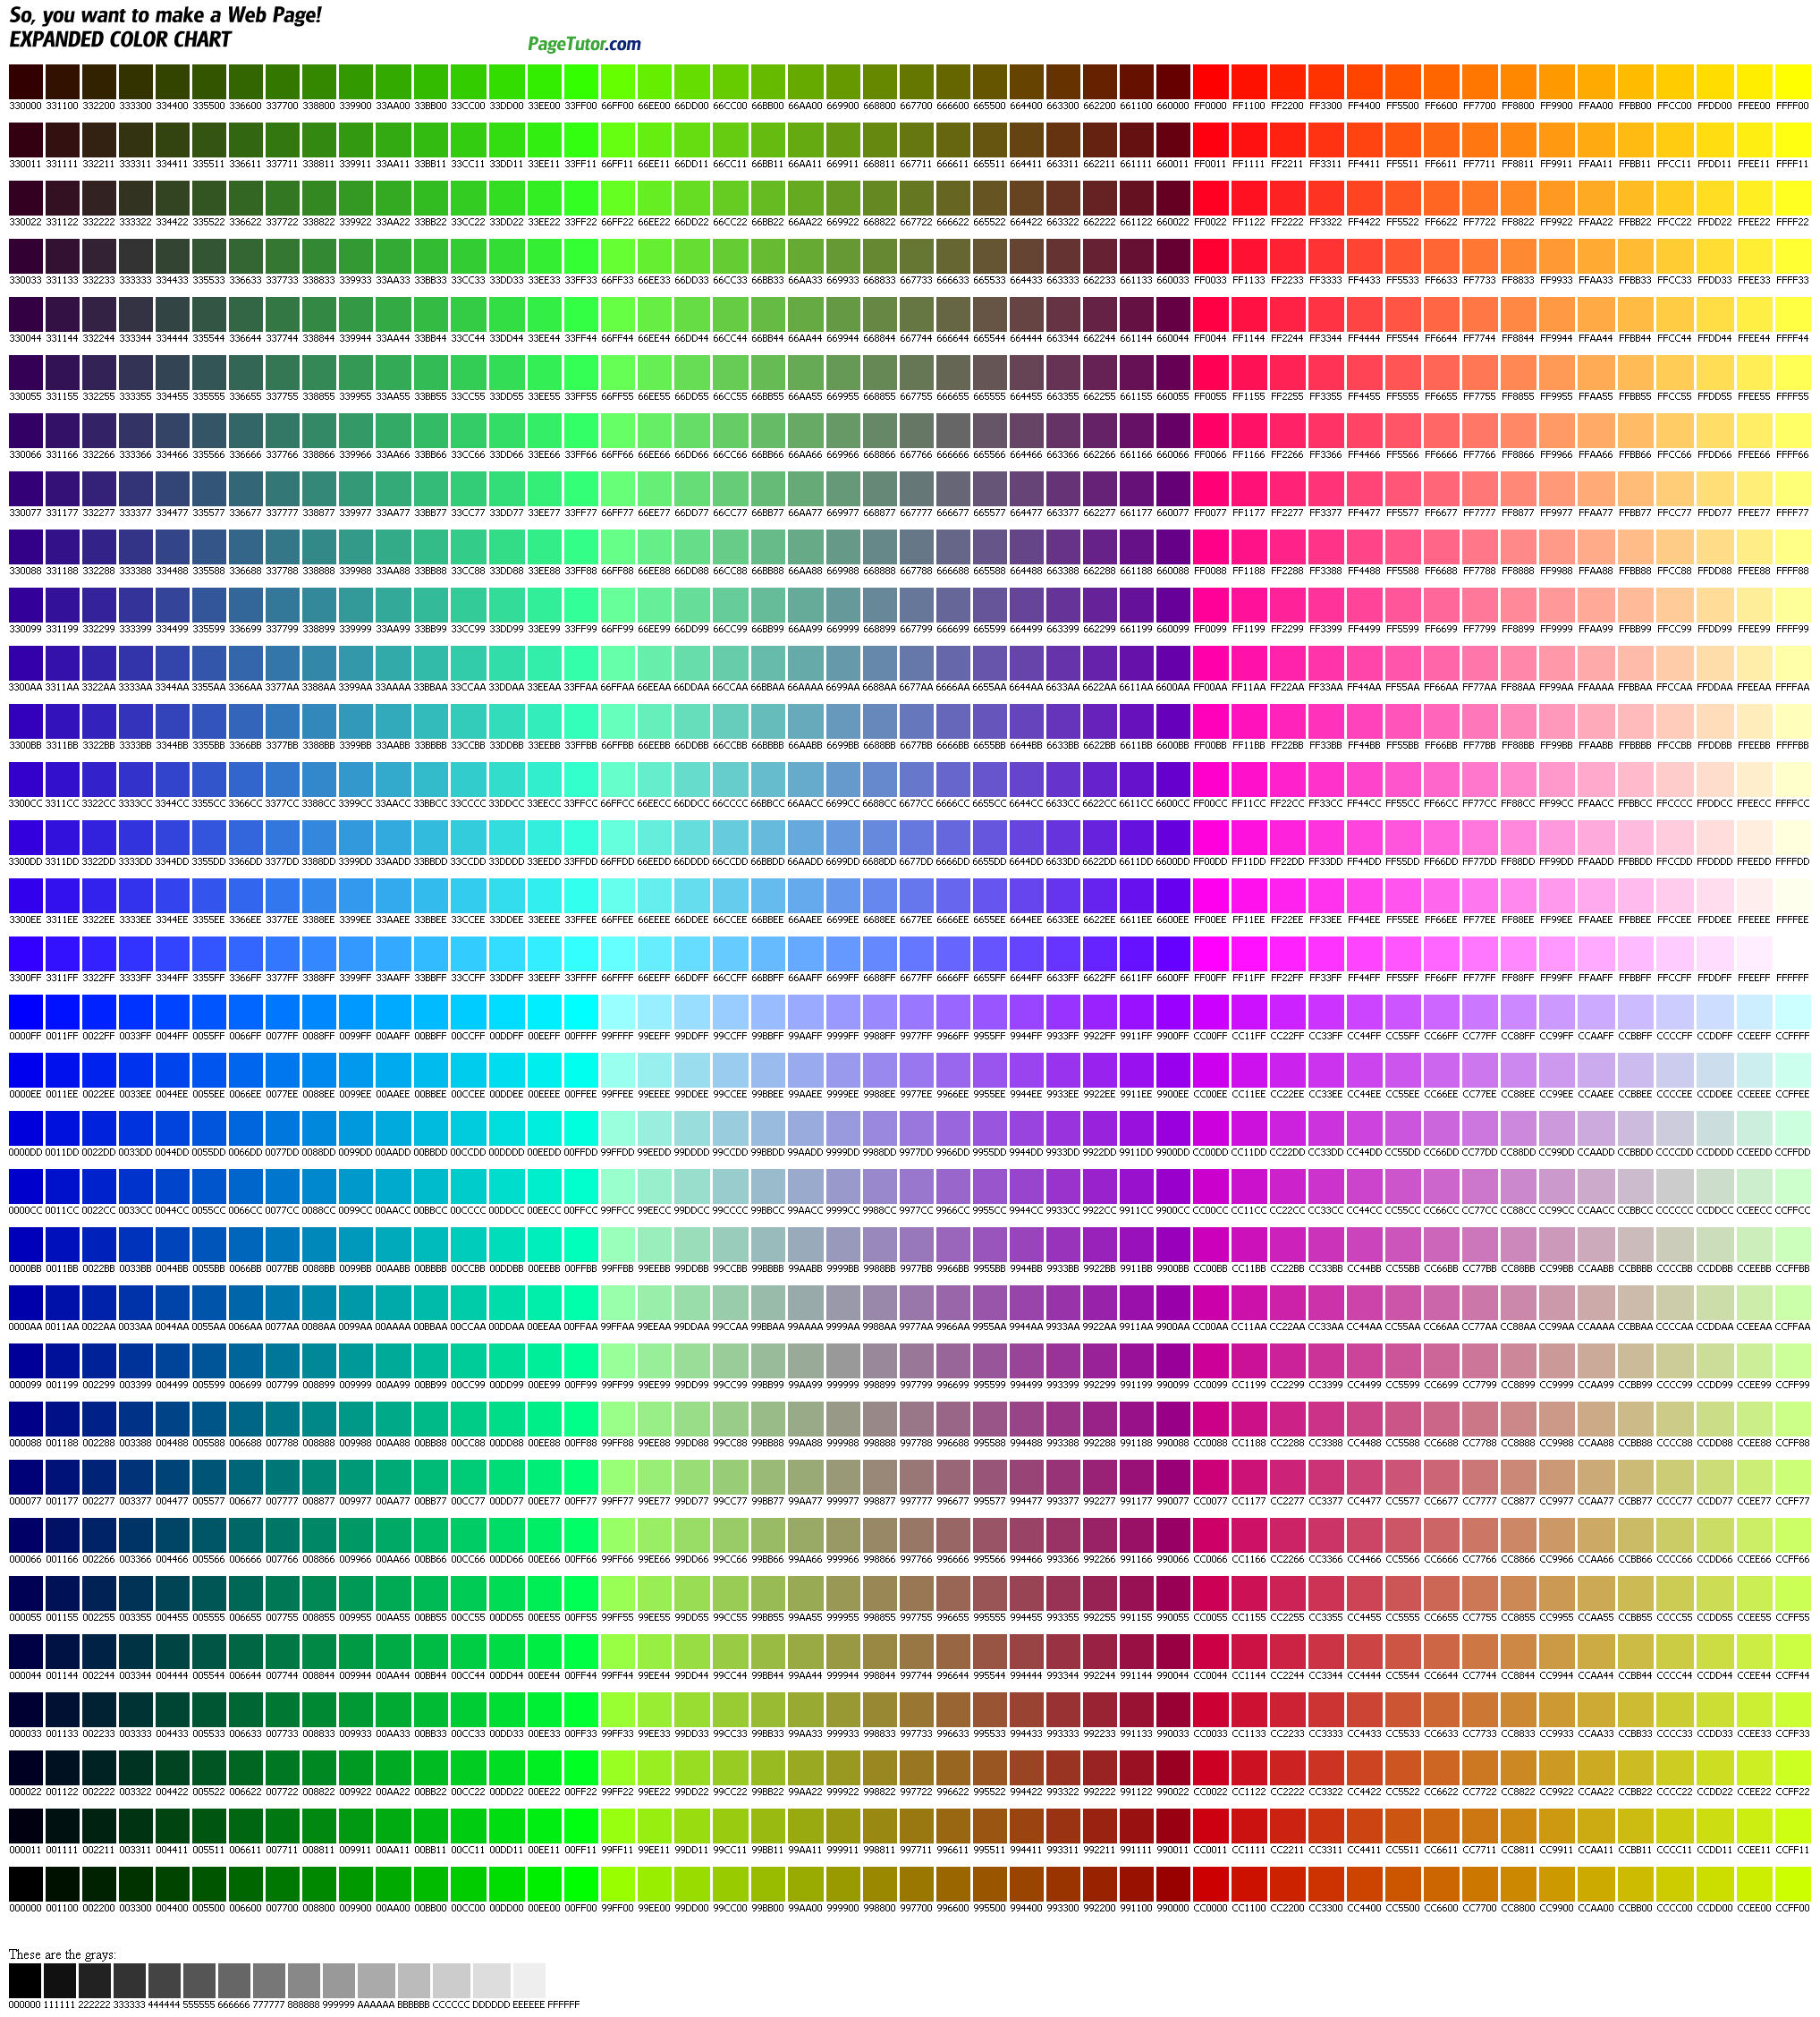
Before I get started on CSS code it is important to learn a little about how color works on the computer and webpages. Color on webpages can be specified by any of the following formats. Each of these can tell your webpage what color to display when your page is viewed.
Before You Get Started!
Before you start changing the CSS code of your blog, I strongly suggest you save or copy your original CSS code into a text editor. This way if you make a mistake you can always restore the original CSS code of your blog by copying it back into your site's editor. I like to use NotePad for Windows or TextEdit on my Macintosh to back up CSS code from my blog. Both programs allow you to simply copy and paste the code from the editor to your blog.
Steps To Changing Your CSS Background Color
The following are the steps you need to change the background color of your blog.
1. Find the HTML editor in your blog
More CSS Color Examples!
Below are some more examples and explanations of what you might find. Understanding these will help you locate the area you want to change and teach you the basics of CSS. Remember you have made a backup of your CSS code so if you make a mistake you can just copy and paste the code back into your site. This means you can play and learn without having to worry.
More Color Please!
The interesting thing about the background color code for CSS is that you can add color to just about everything. Here are some more examples.
Above I talked about making changes to the color of your background but you can also change or add pictures using the CSS background tag. These are some examples of the code you would use to change pictures in CSS.
Did It Work?
I hope you have fun trying to change some of your background colors or images on your blog. Email me if you have any problems or questions. It can be a little overwhelming when you first start CSS but if you stick to it the code will start to make sense.
Classroom Connection
If you are teaching this to students these examples might be a great way to introduce CSS to them. You could also use blogs to help students understand how learning CSS might help them in the future with WCMS.
Enjoy!
Alex
What is CSS?
CSS dictates the color scheme, navigation and overall look and feel of your blog. If you are a beginner to CSS you might want to review this previous post: What are CSS style sheets? This way you get a better understanding of what you are about to learn.
Understanding Color and Web Pages
Before I get started on CSS code it is important to learn a little about how color works on the computer and webpages. Color on webpages can be specified by any of the following formats. Each of these can tell your webpage what color to display when your page is viewed.
- name - a color name, like "red"
- RGB - an RGB value, like "rgb(255,0,0)"
- HEX - a HEX value, like "#ff0000"
- Colors are displayed combining RED, GREEN, and BLUE light.
Before You Get Started!
Before you start changing the CSS code of your blog, I strongly suggest you save or copy your original CSS code into a text editor. This way if you make a mistake you can always restore the original CSS code of your blog by copying it back into your site's editor. I like to use NotePad for Windows or TextEdit on my Macintosh to back up CSS code from my blog. Both programs allow you to simply copy and paste the code from the editor to your blog.
Steps To Changing Your CSS Background Color
The following are the steps you need to change the background color of your blog.
1. Find the HTML editor in your blog
- Blogger you can locate it in the Layout Tab> Edit HTML
- Word Press you will need to go to Appearance> Edit CSS. You should also be aware that some Word Press blogs' templates do not allow you to change the CSS code unless you purchase that feature.
- The easiest way to navigate through your code to find the area you are looking for is to use Edit>Find in your browser.
- I like to use the shortcut CTRL F to find and then CTRL G to continue to find the next instance of background
- You will have to experiment with your CSS code to learn what the creator of your blog has called each of your areas common names are: sidebar, main, footer, body. Each of these indicates where the CSS code is being applied to.
More CSS Color Examples!
Below are some more examples and explanations of what you might find. Understanding these will help you locate the area you want to change and teach you the basics of CSS. Remember you have made a backup of your CSS code so if you make a mistake you can just copy and paste the code back into your site. This means you can play and learn without having to worry.
- body {background-color: black}
- This CSS code tells the blog that the Body (the main area of your page where you post your information) is black. - footer {background: #f3f3f3;}
- this CSS code tells the blog to post the color #f3f3f3 to the footer area.
- the ; semicolon indicates that this line of code in my CSS is completed
- { } the curly brackets open & close the properties.
- You can have multiple lines of code for the footer or other areas of your blog they will be seperated by the ;
- You will know you are at the end of the footer code when you see a "}" - sidebar { background-color: #f3f3f3; background-image:url('paper.gif'); }
- This CSS code tells the blog to post the background color #f3f3f3 into the sidebar (this number is a color in HEX)
- The sidebar in this example also has a graphic in the background called 'paper.gif'
More Color Please!
The interesting thing about the background color code for CSS is that you can add color to just about everything. Here are some more examples.
- h1 {background-color:#6495ed}
- This adds color to anything that has the h1 tag on it.
- h1 stand for header and it is the biggest header you can add. h3 is smaller and h5 is even smaller. - p {background-color:#e0ffff}
-This adds color to just a paragraph (p). - div {background-color:#b0c4de}
-This adds color to an area (div) or a section on your web page.
Above I talked about making changes to the color of your background but you can also change or add pictures using the CSS background tag. These are some examples of the code you would use to change pictures in CSS.
- background-image: Sets the background image for an element
Example: body { background-image:url('paper.gif'); }
- background- attachment: Sets whether a background image is fixed or scrolls with the rest of the page
Example (note all this is the code for the body tag):
body{ background-image:url('smiley.gif');
background-repeat:no-repeat;
background-attachment:fixed; } - background-position: Sets the starting position of a background image
Example (note all this is the code for the body tag):
body{background-image:url('smiley.gif');
background-repeat:no-repeat;
background-attachment:fixed;
background-position:center; } - background-repeat: Sets how a background image will be repeated
Example:
body {background-image:url('paper.gif');
background-repeat:repeat-y;}
Did It Work?
I hope you have fun trying to change some of your background colors or images on your blog. Email me if you have any problems or questions. It can be a little overwhelming when you first start CSS but if you stick to it the code will start to make sense.
Classroom Connection
If you are teaching this to students these examples might be a great way to introduce CSS to them. You could also use blogs to help students understand how learning CSS might help them in the future with WCMS.
Enjoy!
Alex
Subscribe to:
Posts (Atom)